
Building PowerShell Tools for MSPs: HTML Tables for Reporting
This post is part of a series on PowerShell for MSPs.
How to Encrypt Passwords in PowerShell Creating HTML reports with PowerShell is huge for MSPs. Imagine delivering a scheduled weekly report detailing critical information that a client wishes to see. Doing this on the fly sets your company apart from other competitors. Anything that can be queried with PowerShell can be compiled into an easily read HTML table that can be configured to run routinely and sent through email.
Let’s see how to do that.
Querying Information with PowerShell
In this example, we will pretend that we have a server that we want to be proactive about and monitor the disk space by generating an HTML report and emailing it to our IT department.
To do this, we will run the following syntax to get all volumes on the server. Get-WMIObject will allow us to make a WMI call for all physical disks. We will then save this info into a variable called $disks:
$disks = GET-WMIOBJECT win32_logicaldisk -filter "DriveType='3'"
The disk information that we get looks like this:

Notice that the FREESPACE and SIZE properties are not yet converted into bytes yet and can be hard to determine the proper value. For each disk on the server, we will want to arrange and convert the information so that we can easily create an HTML table out of it. We will do this by creating a ForEach statement and converting the sizes into GB format:
foreach($disk in $disks)
{
$DriveLetter = $disk.DeviceID;
$SizeGB = $disk.Size / 1GB -as [int]
$FreeSpaceGB = $disk.FreeSpace / 1GB -as [int]
$PercentFree = [math]::Round((1- ($freeSpaceGB/ $sizeGB)) * 100)
}
Creating the HTML Report
Now that the section is done for collecting our disk info, we can bring in the HTML. We will need to take the information for each disk and create an HTML column row for each disk, then, later, we will combine the column row pieces together to make one complete HTML table.
To do this, we will add the following syntax into our ForEach loop. It will create a variable that contains an HTML column row of our disk information that we have queried. The </tr> tag means that we are starting a column row, and the <td> tag signifies a cell is being created in the column. At the end, we are adding each HTML column that we created for each disk to a variable so that we have the HTML columns for all disks
$disks = GET-WMIOBJECT win32_logicaldisk -filter "DriveType='3'"
foreach($disk in $disks)
{
$DriveLetter = $disk.DeviceID;
$SizeGB = $disk.Size / 1GB -as [int]
$FreeSpaceGB = $disk.FreeSpace / 1GB -as [int]
$PercentFree = [math]::Round((1- ($freeSpaceGB/ $sizeGB)) * 100)
$dataRow = "
</ tr>
<td> $DriveLetter </td>
<td> $SizeGB GB </td>
<td> $FreeSpaceGB GB </td>
<td>$PercentFree % " </td>
</ tr>
$diskreport += $datarow
}
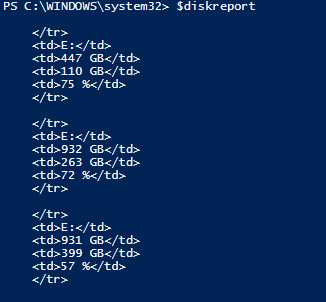
So after running this snippet that we have created we can see we have the information we want for each disk in HTML format:

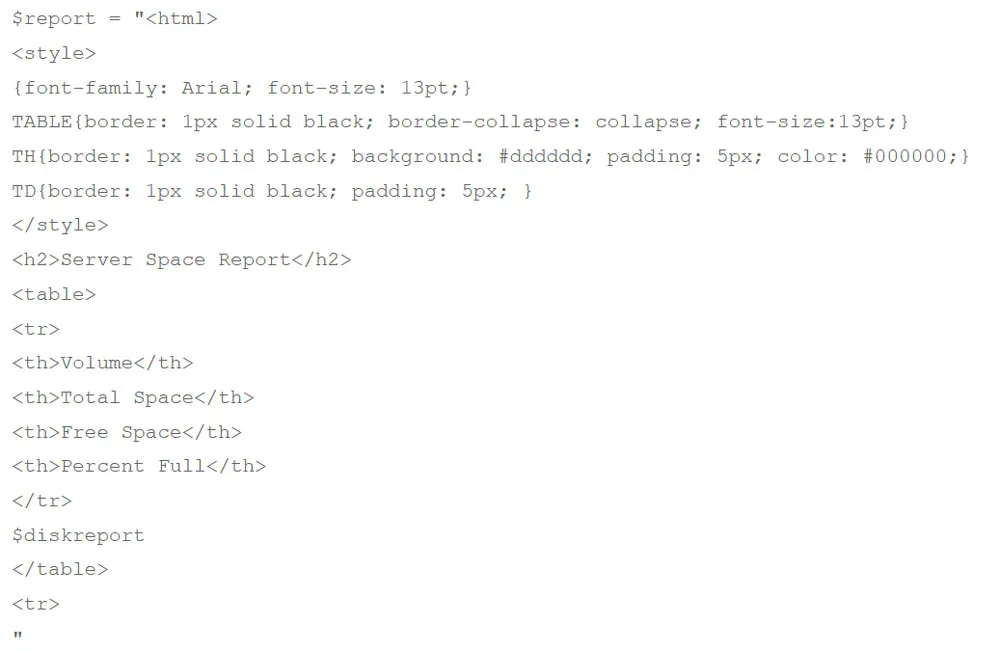
Now that we have our columns created for each disk, we need to put our HTML table together. First, we specify the <html> tag indicating that we are creating an HTML document. Next, we use the <style> tag to define the style of the HTML document, and in this example, we’ll use Arial and font size 13pt.
There are many different options to choose from, I recommend doing a little poking around online to figure out which style fits your report best. Next, we will start off with a header called “Server Space Report,” using the <h2> tag to specify the size of the header. Then we will use the <table> tag to specify we want to create a table and include the <tr> tag to specify the row and <th> to specify the header cell. Then we include our $diskreport variable, which contains the HTML piece that we put together before:

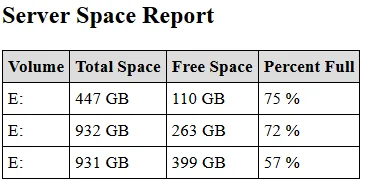
Now our HTML table is finished. If we output our $report variable to an HTML file and open it in a web browser, we can see the result, an easy-on-the-eyes HTML report:

Emailing the HTML Report
Now that we have our table created, let’s configure the rest of our script to send it via email to our IT department. To do this, we simply use the Send-MailMessage cmdlet and specify the -To and -From parameters as well as the –SMTPServer parameter. Also, we will include the $report variable in our -body parameter:
Send-MailMessage -To luke@test.com -From ServerReport@test.com -Body $report -subject "Server Disk Space Report" -SmtpServer mysmtpserver.com
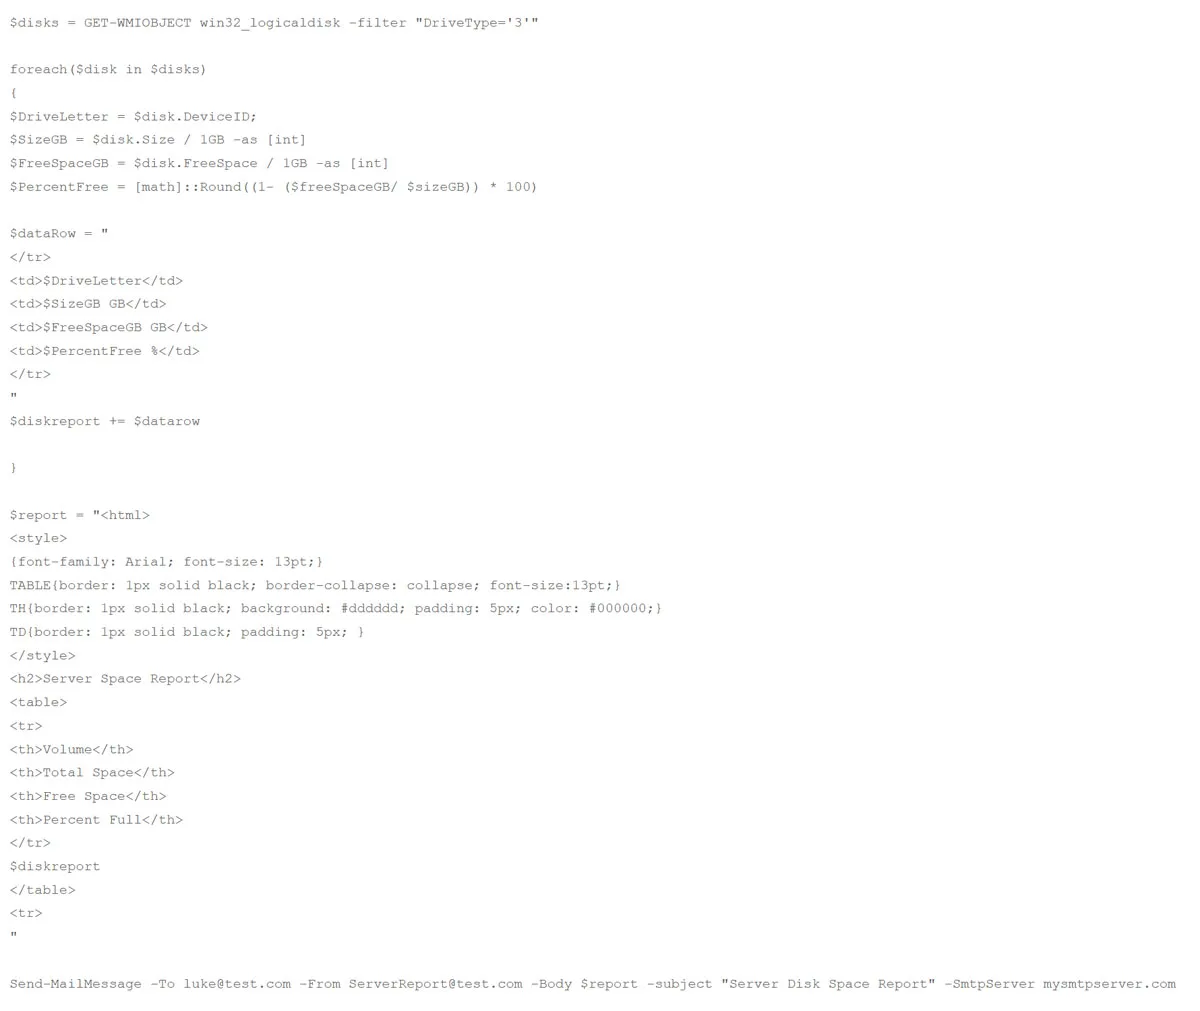
Now we are done. When we run this script we get the disk space on the server, format it into HTML, and send it via email to our IT department. This script can be configured to run daily or whenever desired through task scheduler on the server. Here is our whole script:

Wrap-Up
There are so many use cases for these HTML tables. I have created tons of HTML reports for various purposes. The latest reporting script I created was one that checks the HP iLO configurations on all servers in the environment to ensure that all the iLO settings are correct and then generates an email to report on the servers that are not up to “company standards.”
Creating these nice looking HTML reports will be sure to impress your co-workers and clients.
More articles about how MSPs can make the most out of PowerShell in their operations:
